An altered notebook gift for my upline

One of the fun traditions of going to the Stampin’ Up convention is often uplines and downlines make little gifts for each other.  My way-upline, Julie Gunhus gave everyone personalized notepads and decorated pen.  My direct upline gave me a bag tag, some custom labels, and a cute box made using the new petal punch.  This is what I made to give to my upline:

I found some Spongebob spiral bound notebooks with hard covers in the dollar bin at Target.  I wish I had bought more because they were great for altering.  I picked cardstock that was similar in color to the covers since i was going the quick and easy route of only covering to the spiral binding.  I measured my cardstock to be about a 1/2″ longer on three sides so I could wrap the paper around the cover.  I used the Tombow liquid glue to coat the paper and then glued to the cover.  When folding the paper around to the inside of the cover, I folded the parallel sides over first and then finished by wrapping the side opposite the binding.  I then glued down a piece of white cardstock to the inside to finish off the inside.  Once the covers were wrapped, then I started stamping and embellishing.  I assembled the center image including the ribbon and then adheared the whole piece to my cover with sticky strip.  I waited until the cover was wrapped so I could make sure I had everything centered.  I then stamped the phrase “notes” so it was centered under the image.  I think that was the most stressful step because I was nervous it would get messed up but the stamps worked great and I love how it turned out!

I used the Rough Type Alpha and the Bouquet Bunch stamp sets for the covers.  These ended up being the perfect size for taking in our bag for convention and so I’ll be keeping my eye out to get more for future gifts.

If there is interest in more step by step instructions for making these, let me know and I’ll put something together.

Altered Notebook recipe:
Stamps: 
Rough Type Alphabet, Bouquet Bunch
Ink: Basic black, Old Olive
Paper:  Melon Mambo CS, Basic Black CS, Whisper White CS
Accessories:  Melon Mambo marker, Black Satin ribbon, Watercolor pen, Tombow liquid glue

More baby gifts – thank you card set and a frame

It seems like I know a lot of people having babies right now.  I reconnected with a friend recently on Facebook and learned she was due at the end of August with her first child.  I was so excited for her, I decided to make her a few things to send in addition to a gift card – what i call the light weight version of baby wipes. 🙂

First I created this photo layout for her using a 5×7 frame.  I started with the baby feet wheel and built the layout from there.  I found the DSP in my scrap pile and started layering pieces together.  After I had it assembled, I wanted to give the stamped image a little kick, so I inked up the wheel in Rose Red and wheeled out some more feet so I could cut them out and glue on top of part of the Chocolate Chip image.  Finally, I added one of the Sherbet designer buttons from last catalog.

Then I created a set of simple thank you notes so she has something fun Io send folks who give her little girl baby gifts.  I love the Fox and Friends stamp set for baby stuff and so had to use a variety of critters from the set for these cards.

I also stamped the envelopes to match the cards.  It was a good reminder about how the quality of paper you stamp on affects your image.  I was out of Stampin’ Up! envelopes so I used some of the value pack envelopes that I got from Michaels a while back.  Definitely doesn’t grab the ink nearly as well as Whisper White paper, but it works ok.

Baby Thank You Cards recipe:
Stamps: 
Fox and Friends, Thank You Kindly
Ink: Chocolate Chip
Paper:  Whisper White CS, Melon Mambo CS
Accessories:  Stampin’ Write Markers, Delicate Dots embossing folder, 1 3/8” circle punch, Scallop Circle punch

Trying out the BigShot – a card, a box, and the matchbox

I wanted to put up a quick post before I had to run into work.  This week has gone by so fast and has seemed so busy, but the rest of the week should be more relaxing.  On Tuesday, I was hosting a Technique Night focused on using the BigShot.  Unfortunately, that night I had some folks cancel because of illness, unexpected time conflicts, delays, and getting lost, so it ended up not happening.   One the upside, my friend Jennifer recently decided she wanted to make a baby book for her daughter but had been overwhelmed by where to get started.  So, since she had come over, I helped her figure out what she needed.  She ended up deciding to get the Stampin Up! Baby Girl simply scrappin kit, and after looking at it more closely, I can’t wait for her to get it because I think it is going to be so stinking cute.  Then last night we went to Michaels and picked out an album to go with it.  So, I’m feeling good that we got something productive done. 


So, since the Technique Night didn’t happen this week, I rescheduled it for next Tuesday.  I’m trying something different this time.  I created a meetup group called Portland Card Makers recently and since some of those folks were going to come, I thought I would try out a public location that most people could easily get to and find parking.  So, I ended up finding a Round Table pizza that had side sections with long tables that you could reserve for free.  It may seem odd crafting in a pizza place, but I’ve been to an event at a Fuddrucker’s so, hopefully this will work out.  I guess we’ll see!


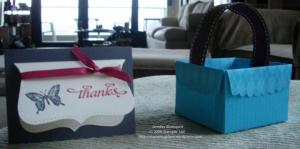
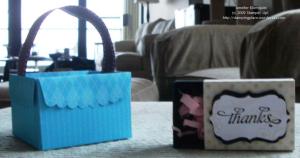
Here are some samples I was playing with for the BigShot.  The first is a card using the Top Note die.  It was an interesting and different way to create a card since the inside of the card is the inside of the Top Note die.  Then, I was going to do a box/basket using the Scallop Envelope die and some ribbon.  The last thing we were going to do at the technique night was a card using texture plates and an embosslit but I’m reworking that card right now.  And then finally I thought I would share a box I made with the new Matchbox die.  It was sooo easy to make since everything is cut and scored for you.  You only need to use one piece of sticky strip or snail and its together!  Plus the die punches out the label that I stamped and put on top.  Easy peasy.


bs_technight_wmbs_matchbook_wm

Pictures from Mom and Me

What a whirlwind spring!  There have been tons of family visits, stamping events, and work deadlines.  That has kept me away from my computer as much as normal but also means I have a backlog of great things to show you! 


First up, I thought I would share some of the projects we did as part of the mom & me event.  I tried to keep the cards simple with plenty of opportunity for kids of all ages to get involved.  So, I’m thinking of going back and sprucing up some of my examples now (like coloring in some of the images that I left as outlines for kids to color or leave as is) but since I want to get a post up, I’ll show you there current state. 🙂

 And my SCS blogging group, sorry I’ve been away so long but I’m back and will be visiting your blogs very soon!


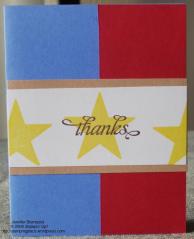
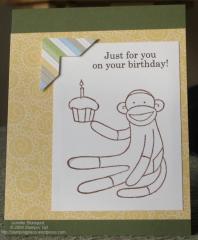
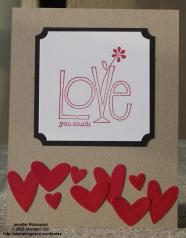
Here are the cards we did:

star_thanks_wmmm_monkey_wmmm_lym_wm


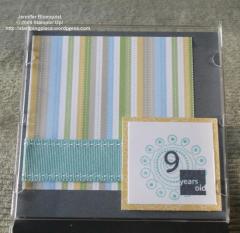
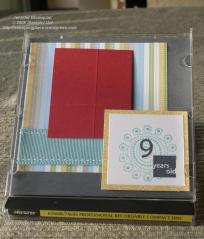
This is a photo frame we did using a CD case as the holder. All you have to do is pop the cover off of the case and then rotate the cover so it would stand up if the cd case base was on the table.  Pop the cover back on and then slide in your decorated background.  In the second picture, I didn’t have a photo printed out to put in the frame, so I put a red piece of card stock in to show you how you don’t glue down the top left corner so it can sit over your photo.  🙂  Its easy, peasy!cd_photomat_wmcd_photomat2_wm

Making the “magazine” card holder

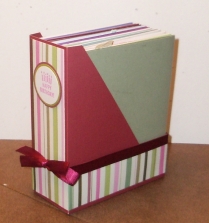
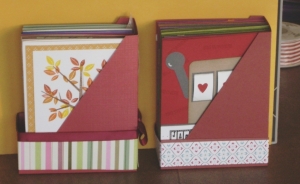
photo_folio_sideI’ve gotten a few requests to post the dimensions for the card hold I made that looks like a magazine file.  I was getting ready to post the information, when I realized that this was actually made using a template that the super talented Becky Roberts created and sells.  I contacted her about sharing the information and she requested that I not post too detailed of instructions.  She has a free tutorial on her site for a mini-version of this project, so you should be able to get the gist from there.

However, while waiting to hear back from her about posting some information on how to make your own holder, I started playing with her template to see if I could figure out how to make the base holder (without the designer paper)  out of a single 8.5×11 sheet of cardstock, as her template calls for starting from a 12×12 cardstock.  In the process, I played with different widths and depths but it turns out that while you can just barely do it, the extra breathing room in her design can be nice. 

two_mag_files


My best design, turned out to be 5.5″ tall, 4 3/8″ long (yeah, that was fun to score :)), 2″ wide, and the base band was 1 1/8″ tall (so, 1 1/8 + 4 3/8 + 5.5 = 11″ exactly).  As you can see from the picture on the right, her design on the left has more space for the cards (mine on the right fills up the whole depth with little to no wiggle room) and the taller base band is a little more supportive for the cards.


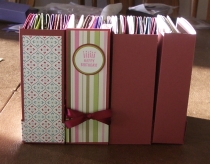
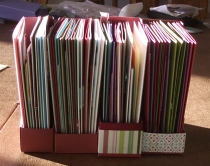
  The upside from all the trial and error, I ended up with a handful of these to use for my card storage. all_folio_frontall_folio_back  You can see from the pictures my different widths and band heights.

Decorating a Birthday Gift with Stamps

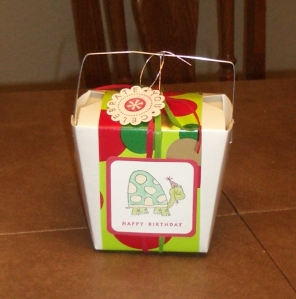
I’m always looking for ways to use my stamps in different ways.  giftbox_beforeSure I love making cards, but sometimes you need something different and its fun to use your stamping supplies to add that personal touch.  In this case, my sister-in-law’s birthday is 2 days before Christmas.  So, when I bought her a gift at the local soap store, they offered to decorate the box as a gift.  I couldn’t turn down free gift wrapping but after they gave me the wrapped gift, I realized it was really Christmas wrapped.  My birthday is a week before Christmas, so I’m pretty sensitive to differentiating birthday and Christmas gifts, so I wanted to make sure her gift was definately “birthday” and not “christmas”.  So, stamps to the rescue! 


giftbox_after

 The turtle is from a hostess set from the last catalog, but the tag is from the new Party Hearty set and the Happy Birthday under the turtle is from A Little Birthday Cheer.  This was also my first time in a long time using water color pencils.  They are like magic!  🙂  If you haven’t used them before, you color in an image with the pencils and it looks like normal pencil.  But then, go over the colors with a water pen and suddenly the color blends and instead of pencil marks, you just have a smooth watercolor image.

Trying out a new bag style – paper purse

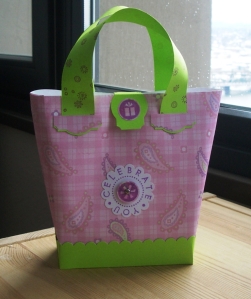
So, I’ve seen a lot of folks make different paper purses/gift bags/bag in a box/etc and I’ve dabbled a little in making these projects but only a little.  With my mom here for the holidays, she brought lots of project designs and creative motivation.  So I decided to try something new.  These purses are really cute in person and actually really easy to make.

celebrateyoubag

The stamp set is Party Hearty for the clasp and main bag element with Sprinkles backgrounds on the paper straps.  I admit I completely cut corners when it came to making this sample since I didn’t know what I was doing.  I used some old paper I had lying around and paper instead of ribbon for the straps.  However, it came together pretty well, so I’ll probably make another with my heavier weight SU DSP and ribbon.  Well, gotta get back to crafting!  Gotta use some of the sneak peek stamp sets before mom takes them home with her. 🙂

Finally able to post pictures

So, while away on my trip, I tried posting the pictures from last week.  Unfortunately, my internet connection was apparently not good enough to make that happen, so I wanted to get out a quick post this morning. 

Like I said last week, we had a great time getting ready for the holidays by making gift packaging.  I posted most of the items we made, but I didn’t get a chance to post the final two items. 

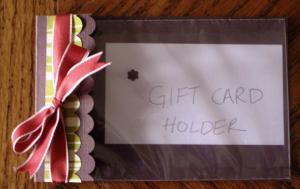
scallopedgc This bag was one I first saw my mom do and I thought it would be perfect for holding gift cards.  It is super simple to do; so I thought it would be a good addition to the class.  All you do to make it is cut a piece of 3×6.5″ cardstock, scoring at 5″.  Use the scallop punch to edge of the flap of the main cardstock. Using sticky tape, adhere a 3×5″ cello bag to the 3×5 section of cardstock.  Punch holes through the main cardstock and cello bag (one on each side) about halfway between the 5″ score line and the end of the flap – don’t punch through the flap itself.  Run ribbon from the back of the holder, through the holes, and then use to tie the flap down.

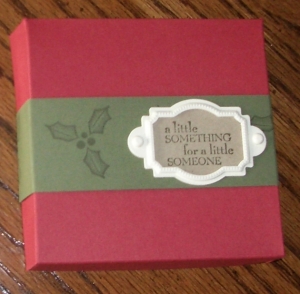
holidayboxThen, while waiting for the ladies to show, I decided I wanted to play with my new designer label punch and some hardware from the Hodgepodge Hardware kit.  So, I created a box with a band that would hold a designer label hardware piece.  Since it was based on the pizza box style boxes, it was super fast.  I just wish I had stamped the main cardstock instead of just the band.

Recipe (GC holder):
Stamps:
none
Ink: none
Paper: textured chocolate chip CS, Ghostly Greetings DSP
Accessories: scalloped edge punch, crop-a-dile, Ridinghood Red taffeta ribbon

Recipe (box):
Stamps:
Christmas Classics, Best Yet (hostess)
Ink: Always Artichoke
Paper: Ridinghood Red CS, Always Artichoke CS, Kraft CS
Accessories: Hodgepodge Hardware vanilla

Yet another holiday gift box

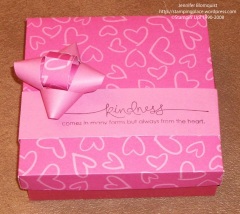
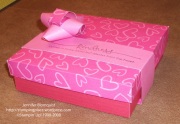
So, after finishing my DVD sized gift box for my Holiday Boxes, Bags, and Tags class, I decided I wanted to try to make a box where the top didn’t completely cover the sides (ie – you can see the bottom half of the box when you are looking at it from the side.)  I tried digging around a bit for a template but couldn’t seem to find one so I started experimenting (I’m sure there is one out there but I just missed it).  Since this was a complete experiement, I grabbed some spare cardstock I had lying around to try it out. 

The finished box is roughly 5×5 but I think I could tighten up the measurements a little.  The nice thing is that since I started with two 12×12 sheets of paper, I had enough scrap to make a band to surround the box plus paper to make a little holiday bow (yeah, that wasn’t my best work ever, but it made the point :p).  I did however use my Heard from the Heart stamp set to add a sentiment to the box band.

kindness-box-top-wmkindness-box-side-wm1

Rescheduled! Holiday Gift Bags, Boxes, and Tags class

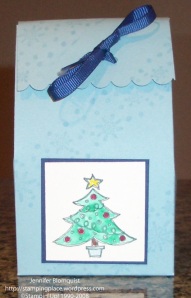
scallop-bag-wmSo Sunday afternoon, we were planning on having a Holiday Gift boxes, bags, and tags workshop.  However, due to some illnesses during the week we ended up doing some open craft time and rescheduling the actual class. 

It looks like the new tentative class date is the evening of Tuesday, Dec 9th (same day as the retired stamp list is announced).  So, if you were interested in coming but couldn’t make it on Sunday, drop me a line and join us for the newly scheduled class!  We’ll be making this cute little  bag as one of our projects! 

Recipe:
Stamps:
Fun and Fast notes, Snowflake wheel
Inks: Bashful blue, Hunter Green
Paper: Bashful Blue CS, Very Vanilla CS, Night of Navy CS
Accessories: Stampin’ Write Markers, Water pen, Night of Navy grosgrain ribbon, Scallop edge punch