My new Facebook page – SU display boards and a Fan Special deal

While I work on writing up blog posts for some projects I’ve done recently, I wanted to share my recent labor of love – a new Facebook page.  I’ve set up a page on facebook at a place to share pictures, promotions, and make it easy for others to share their projects as well.  I’d love for you to check it out.  Right now it has a couple photos posted that will be making their way onto the blog soon but you can get an early look by visiting my Facebook page.   I’ve also posted photos of more convention display boards on the page as well.

While you are there, become a fan to be eligible for special deals and get samples and information as it comes out.  Once I have 25 fans, I can make the web address for this page much easier to find; so I’d love it if you were willing to be my fan. 

Visit me on Facebook!

Facebook Fan Special

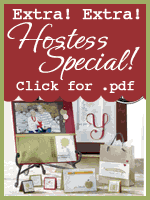
To thank folks for helping me get to 25+ fans, I’m offering a special from now until 8/19.  I’m offering this special to anyone who has become a fan of my facebook page.  Simply place an order of $25 or more and receive the new Antique Brads FREE!  That’s a $5.95 value for free just for becoming a fan.  For example, love the vintage look – try the new Crochet Trim ribbon and the Distressing Kit and get Antique Brads FREE!  Thats a $33 value for $27.  Email me to take advantage of this special offer!

Crochet Trim

Distressing Essentials Kit

Free Antique Brads


See a sample using some of these items in this post –  https://stampingplace.wordpress.com/2010/08/06/stampin-up-convention-2010-punch-happy-swaps/

Organizing my craft room

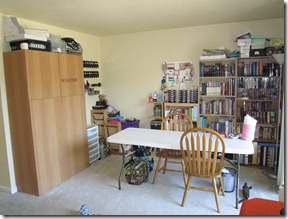
Between the big color renovation, the old catalog retirement, and getting ready for convention, my craft area had become a disaster zone.  You know the feeling… table buried under paper scraps, adhesive backing, ribbon, stamps, half completed projects. 

IMG_1103Well, I decided it was time to dig out and get organized so I can start using all the cute and fun new stuff that I’ve gotten recently.  Now I’ve gotten everything put away and it is definitely more motivating to craft. 

If you have any tips or tricks for organizing, I’d love to hear about them.  Please leave a comment and/or a link to a photo of your creative organizational techniques.

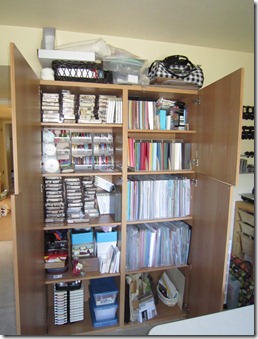
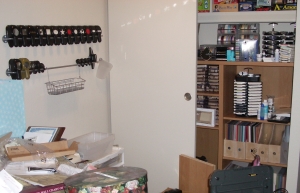
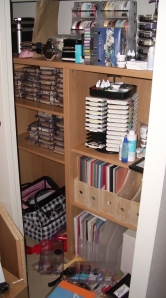
For me, I love this bookshelf I got at IKEA.  It is very strong, which I need for all the paper I’ve accumulated. Smile I have a shelf for retired stamps, ribbon, current stamps, cardstock, 12×12 paper, ink, wheels, and misc other stuff.  Plus the doors keep it out of the sun and away from little baby fingers. 

Tip:  Turn you paper holders (the mazagine file style) on their backs so what is normally the top is pointed to the front.  This makes it really easy to see what paper you have and you can grab and go without pulling out the whole container.

IMG_1102

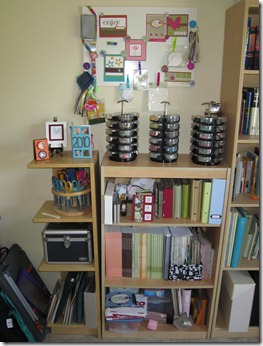
I also have a smaller bookcase where I store my catalogs, magazines, small albums and my stack and store spinners.  Let me tell you, I LOVE these spinners and for some reason it just makes me so happy and ready to embellish when I see them sitting out in a row.

Tip:  Use a magnetic board to put up cards or projects that inspire you.  Hang embellishments that you want to use but don’t have an easy storage space with magnetic clips so that they are in front of you (so you remember to use them) and easy to grab and then put away.  You can also get magnetic spice containers with clear lids to store small items like die cuts, brads, or gems.IMG_1106

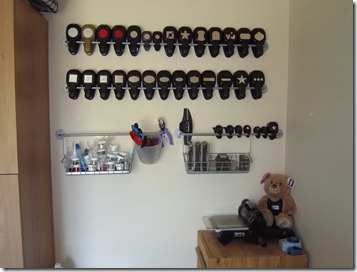
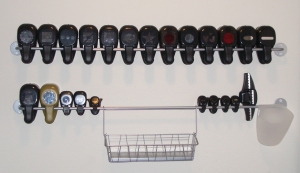
Finally, I have my punch storage.  These rods work perfectly for the old style of punches and I recently found that the hanging wire baskets that you can get to go with them are just the right size for the new slim style of punches.  It’s the perfect system for a punch junkie like me.IMG_1107So that is my craft space.  Hopefully you saw some new idea or at least a reminder for one of your own projects.  I’d love to hear your thoughts on what organization solution you like or if you have some new ideas for me!  Until next time, I’m off to make a mess again!

Stampin’ Up! Convention 2010 – Swaps, Parties, and a Baby!

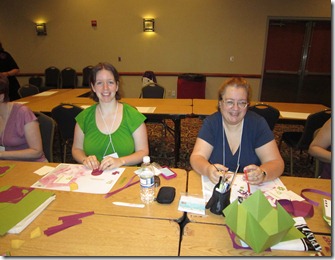
I’m back from a trip to Salt Lake City for the 2010 Stampin’ Up! convention with my Mom and upline, Kathy, my dad, and my son.  I love the chance to go meet other demonstrators, including folks whose names I’ve seen on emails but now I got to meet in person, hang out with friends, get super cute stuff, swap gorgeous cards, and generally get pumped about Stampin’ Up!  I have way too many photos to share all of them in one post so I’ll be posting pictures in future posts as well.  But for now, here are some of my highlights.

Before convention even got started, mom and I participated in two days of preconvention stamp camps and swaps with Late Night Stampers

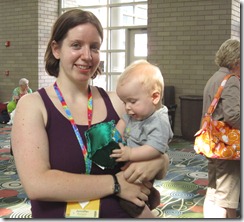
IMG_0819 Then came Wednesday – Check in day.  This is the day that everyone lines up in the early morning for a chance to be one of the first to get into Memento Mall (the SU convention gift shop).   My dad was kind enough to go get in line when he got up around 6:15am and he wasn’t the first in line!  By 7:30 the line was around the block. :)  checkin day line photoBut unlike Disneyland, its fun to stand in line at convention.  Everyone is swapping and I even saw a friend of mine from Portland (Hi, Liz!) and got a chance to introduce her to Nicholas. IMG_0856

After we swapped, checked in and got our free stamps and bag, we relaxed before meeting up for a group photo and swap with our upline group – the SBStampers.  It was there that Nicholas got his very first swap.   He loved playing with this fabric squeaky toy made by Charity Lawson using the Scallop Square die for the BigShot and a squeak toy from a pet supply store.IMG_0871IMG_0873 

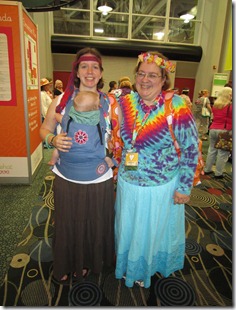
Later we got dressed up in our grooviest attire for the Flower Power party.  Sadly, I missed getting my face painted by SU illustrators but I did participate in some fun games.

IMG_0876

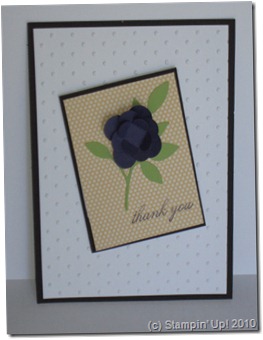
That was only the beginning of a fun weekend.  Here is one of the swaps I created to trade with folks over the course of the weekend.  The flower is made using the Flower Fusion sizzlit that in one tiny little die cuts out 3 flowers of different sizes.  I then folded up the petals and stacked them using glue dots.  It really does pop off the page, which I thought was fun and cool.  I think you could step it up a notch even more by adding a pearl or rhinestone to the center of the flower.  I would have done it but I ran out of time.  But still, i like how it turned out and folks seemed to as well. Flower Fusion Swap Card

I have to say, I love all the cards I got swapped and will be showcasing come of my favorites in a future post so you can see these great ideas too.  More photos and swaps to come!  Until then… Happy Stamping!

Convention 2010 Thank You swap card:
Stamps: Because I Care (hostess set)
Inks:  Concord Crush classic ink
Paper:  Basic Black CS, Whisper White CS, Pear Pizzazz CS, Concord Crush CS, Play Date DSP
Accessories:  Polka Dot Impression Folder, Flower Fusion sizzlit, Little Leaves sizzlit, glue dots.

The Stampin’ Up! Last Chance list is here!

Its that time of year again when we have to bid a fond farewell to many favorite stamps and accessories.  This year is even bigger than ever with the big Color Renovation happening, lots of accessories, paper, and ink are retiring to make way for the exciting new colors coming on July 1st. 

Check out to see if your favorites are soon to be retiring and remember – All items on the retiring accessories list are while supplies lastSo, if your favorites are retiring, order fast to be sure you can stock up.

Last Chance Stamps –

see the full retiring stamp list here


Last Chance Accessories –
Notice that some items are 25-50% off!

see the full retiring accessory list here

Order online today to get all your favorites before they are gone forever!

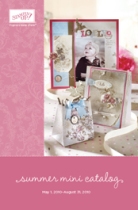
A New Mini Catalog plus free brads and more

Summer Mini Catalog: May 1 - Aug 31

Well, May is here and that means that the new Summer Mini has been released.  Boy is it a doozy this time!  With something for everyone, there are great products for scrapbooking, vintage, new punches, awesome new accessories, papers, stamps and more. 

As a bit of a punch junkie, one of the items I had to order was the new Itty Bitty Shapes punch pack.  That’s right, punch PACK… where you get three small punch shapes that not only coordinate with a stamp set but also with some new clear Bitty Buttons.  How cool is that?!?  I’ll be pulling those out to play with this week.  So, while I’m working on some samples to share with you all, I wanted to also share some cool promotions going on this month.

Promotions

Free brads – Celebrate National Scrapbooking month!  Love fun brads to accessories your scrapbooking and card projects?  Well, for the month of May, purchase select stamp sets and receive a FREE package of designer brads.  Check out the flyer for all the details.

Free stamps and more – Ever thought of starting your own business or just having access to tools, ideas, and a great discount for your own crafting hobby?  Well, Stampin’ Up! may be the perfect opportunity for you.  With such a supportive community, lots of awesome resources to learn new tips, tricks, and ideas, and a chance to not only earn 20% of everything you buy or sell but to grow your love into a fun home business.  I love being a Stampin’ Up! demonstrator and would love to answer any questions you have about if it is the right thing for you. 

If you are ready to join the Stampin’ Up family, sign up through my online website (passcode is “stampingplace”) or contact me to get started.  Right now, not only is Stampin’ Up going to send you two awesome Workshop WOW DVDs with great ideas and techniques but I’m going to sweeten the deal a little.  As I mentioned above, during May, when you purchase certain stamp sets you get FREE brads.  Well, sign up to join my Stampin’ Up! team this month and I’ll GIVE you your stamp set for FREE as well.  If you have any questions, don’t hesitate to contact me!

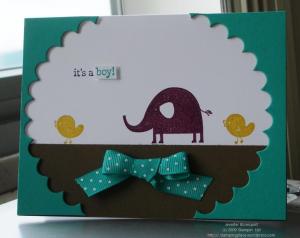
It’s a …..

boycard_wm

Well, I’m happy to share that we found out earlier this week that we will be having a little boy come Christmas time.  So, of course to commemorate the occasion I had to put together a quick card to share the news. 🙂 


I wanted to play with some scraps left over from cutting a scallop circle with the BigShot and start coming up with some ideas using the Nursery Necessities stamp set.  I have a feeling I’ll be getting a lot more use out of this stamp set over the next year.   If you have put together some cute baby cards or scrapbook pages, I’d love to see your ideas.  Leave me a comment with a link to your blog or photo of your design, and I’ll check them out.

Well, I’ll leave you with baby’s first picture and I’m off to finish my Stampin Up convention 2009 scrapbook!

baby boy

I’m back! Plus some news.

Hello!  After a bit of a summer break I’m back and excited to be getting back into blogging.  I’ve just spent the last four days in Salt Lake City for the Stampin’ Up! convention and it’s been a blast!  I’m so excited to be coming home with cute samples, swaps, ideas, and info on some awesome new products and promotions!  I actually fly home on tomorrow morning so I plan to start getting my pictures uploaded and sharing what I saw and learned.

Until then, I thought I would share with you some of my fun personal news.  I’ve been having a hard time staying up at night for stamping because I’ve been so sleepy so early.  But I’m happy to share that those early nights are for a good cause as I’m working on growing a healthy, beautiful baby that will be joining my family around January 2nd.  🙂 

 This will be our first and so I’m nervous and excited at the same time.  However, that means more excuses for cute little baby cards and of course a scrapbook!  If you have tips or advice, I’d love to hear what you have to share.

So, I promise to get some photos posted soon, but until then, happy stamping!

Working on my new craft room

Ever have one of those projects that keep you obsessed until you get it done? My craft room is one of those projects. After two weeks of being super busy (out of town on a business trip and my MIL visiting), the house is finally quiet again. 


While my MIL was here, she helped me get motivated to organize my space and move all my crafting stuff out of the dining room and into my office/craft room. Now, this is the room that has never been unpacked completely since we moved in last fall and so it has been the holding space for tons of boxes and misc stuff.   So this project is not one to be taken lightly.  However, after much debate, I decided to go to Ikea and get a bookcase as a storage solution for my office closet and rods to hang my punches from for the walls.  While she was still here, I managed to finish building the bookcase, but didn’t have a chance to hang the rods or finish moving everything in to the craft room.  So, now, instead of creating projects (which I need to do), I’ve been obsessed with finishing the migration to my new craft space.  So, since I don’t have a card or craft project to share, I thought I would show you what has been taking up some of my evening time.  I even manned the power drill last night and drilled and hung the rods I’m using for my punches!  Ignore the surrounding mess in the pictures; hopefully I’ll have some clean awesome space pictures to show you next week! 


Hope you all have a great weekend!

punchesmessy_officecloset

And now for a little bit of muzak

Well, I finished my last index card last night and had a lot of fun with it.  It is one of my rare, very simple cards.  No layers even!  Unfortunately, I waited until this morning to try to take a picture of the card before work (I’ve found the early morning light tends to be good lighting for pictures).  Sadly, we had a ton of fog and so none of my pictures turn out.  So, I’m waiting until tomorrow to try again.  Until that time…. here is my version of muzak — a non-stamping post.  I promise to get back to the stamping stuff tomorrow! 🙂


My story of the new haircut:


I’ve started getting into the bad habit of all of the sudden looking in the mirror, deciding my hair has turned into an emergency and I must get it colored/cut/styled asap.  That happened to me yesterday and so this afternoon I made an appointment for this evening for a haircut.  Of course, it being so last minute, I had no idea what I wanted other than “better than it is now”.  My stylist showed me a picture of a cute bob and I thought “what the heck” and said sure.  Unfortunately, the part I didn’t think about too well is that this hair style has bangs.  Not in the traditional blunt cut across the eyebrows way, but the sideswept, falling into your eyes kind of way.  I realized the full consequence of this when I saw all the hair falling to the floor and now am brushing my bangs to the side ever two minutes.  The worst part though, was that I was still adjusting to the haircut when my husband and I met up after he got off work.  His response? 

Him: “Did you get your haircut?” 

Me:  “Yep”. 

Him:  “Um….okaay”.   Sigh. 

I still don’t quite recognize myself in the mirror, but I think I’m going to like it tomorrow.  I think the problem is that this is a hipper haircut than I’m used to. 
But what is true in crafting is true in hair — try something different and new, it may not be perfect the first time, but you may turn out with something great you never would have thought to try.

Thank You Kindly Index Card and the Philosophy of Card Fronts

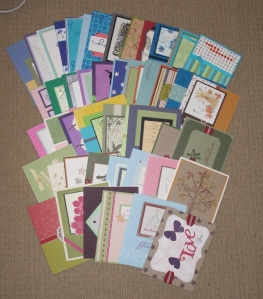
For a while now, I’ve been a member of the card front club.  That is, someone who participates in card front swaps and who creates card fronts when making new card projects.  I always told myself, “I’m saving cardstock this way” and some folks say it saves a lot of room when storing your cards.  cardfront_projectIt made perfect sense, right? Well, I realized that I’m not nearly as organized as I’d like to be and often I’m just grabbing a card last minute from my stash.  (Thankfully, I have a large enough stash, I can still tailor my choice to the recipient.)  In any event, I like to have my cards ready to go so I only have to write on the inside and put it in an envelope. 

So, this weekend I started project “turn cardfronts into cards”.  Over the course of three nights, I cut, scored, folded, and glued card bases to 46 of my cardfronts.  And last night, I finished the last card.  It was during this time that I realized that I like how cards look better when I go ahead and use a half sheet of cardstock for the card base instead of making a card front and later trying to line-up the front on a separately cut base (I wasn’t so good at that sometimes).  Plus, while I might be saving a few cents not using as much colored cardstock, sometimes it really does look nicer to have the color for the base (I even used a half sheet of colored cardstock for some of my cardfronts – definitely using more cardstock that way!).  So, now I’ve swung over to the “just do it” camp and will leave card fronts for pretty much swaps and special uses only.  I’d love to hear other people’s thoughts on this topic though.  What do you like better?


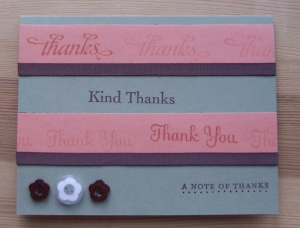
Once that was all done last night, I didn’t have much time or energy for much else.  So, I tried working on my index card project.  I picked up my Thank You Kindly and some paper and got to work. 

thankyoukindly_index

This was one of those times that you think you have a great card idea and as soon as you start stamping you realize that “great” isn’t quite the right adjective. 🙂  It also doesn’t help when you cut your cardstock and then realize you totally cut at the wrong sizes!  So, I kept tweaking it as I went until I got to the point where I knew it needed something but everything seemed too much.  So, I finally went with putting on the button latte buttons (I love, love, love these buttons!!!) because the empty space was driving me nuts.  So, while its not my most shining work, its not bad for a card that had to use every thank you sentiment in the stamp set and no other stamp set period.  I call this one good enough and will be moving on tonight to Simple Stems. I’m feeling a little more optimistic about that set.   


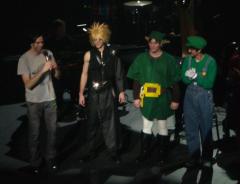
And yes, for those of you who left comments about my Video Game Live concert experience.  You are right, I had a camera. 🙂 Though the host actually encouraged use of recording devices at one point, so I don’t really feel bad.  Unfortunately, my pictures were mostly blurry so I can really only share the costume contest line up.  These were concert goers who dressed up for fun, glory, or a prize.

vglive_sm vglive2_sm