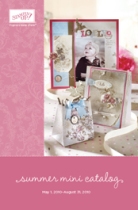
When I was visiting my mom last week, we got a chance to try out some different stamps and punches. (One of the fun things of having an upline/downline – you can share stamps and products so you can try them out without having to buy everything yourself). One of the items she had just received was the new Owl Punch. This punch makes really cute cards – like this one that was shown at convention 2010.
But one of the other things you can do with it is make other neat punch art like bats and even a flower. So, we decided to try out making a flower with the punch and once I had the flower, I then built a simple card to use it with. We use the description found on the blog Flowerbug’s Inkspot to create the flower. Her blog has a great description and photos but here is the quick version:
Start by punching out 7 owls. Take the main body of the owl from the punch and trim off the legs. Then you fold the body in half so you have a centerline. Fold the rounded bottom part of the owl in towards the center line so it looks kind of like a pie wedge. Trim a curved lines starting from the point of the ears into the center line to make the white petals you see below. Then glue the 7 pieces to a base piece of paper in a circle to make the flower. I then added a vintage tag to the center and pierced two holes in the base cardstock to run the string through. This allows the flower to swing like a pendant.
If you’ve found other fun ways to use this punch, I’d love to see them. Leave a comment with a link to your blog or site with the sample and I’ll check it out!
Recipe:
Stamps: Watercolor Trio
Ink: Elegant Eggplant
Paper: In Color DSP – Peach Parfait (Hostess), Crumb Cake CS, Very Vanilla CS
Accessories: Owl Punch, Lg Scallop Circle Punch, Baja Breeze double stitched ribbon, vintage tag, Adhesive Pearls, Paper Piercer.
Filed under: Cards, punch art | Tagged: card, jennifer blomquist, owl punch, punch art, stampin' up, watercolor trio | 3 Comments »


